For the Operation TBD trailer, I wanted to create a Wizard of Oz kind of feeling, going from last year's event in sepia and switching to color for the upcoming event (besides, Andrea's music makes me think of old movies). I wanted the books in the video to simulate Rocking the Drop - teens and authors and publishers dropping thousands of books across the country - and used a few book covers from each of the publisher donors. Even better, and totally coincidentally, the first book to pop up is a Wizard of Oz graphic novel!
Ok, once you have your music and an idea rattling around in your head, it's time to create the images. There are basically three ways to do this: use video footage, use still images, or create titles within your moviemaking program.
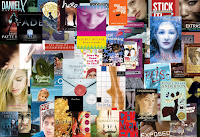
The TBD trailer is compiled of still images (made in PhotoShop) and title effects (more on this later). For the rgz/GuysLitWire/YALSA/ publishers/tons of dropping books section, I made over 70 images to layer one after the other. Here are just a few:


Here's the part where the Mac people will want to throw fruit at me, because I use Windows Movie Maker (even worse...I run Vista on my MacBook Air). So I know there has to be a free moviemaking program for Mac OS X (iMovie?), but it's probably so user-friendly that you don't even need this tutorial (uh, unless you happen to be running Vista on your Mac).
 In Movie Maker, everything is pretty drag-and-drop. The import bar is on the left, and you can import videos, pictures, and audio files. Once you have imported all of your components, you basically just drag and drop them onto the appropriate slot on the timeline bar at the bottom. To add titles (all of the text zooming in and out), just go to Tools -> Titles and Credits, and follow the instructions.
 To create effects, like old film grain, fading in and out, sepia, or the cool warp that made Ellen Hopkins' books look like they were marching across the screen, go to Tools -> Effects. A bunch of options will present themselves. You can test them on the upper right screen and then drag and drop them directly onto each slide.
You can synch your images and titles by using the zoom tool above the timeline bar and adjusting the length of time that image is in the movie down to fractions of a second - for instance, I tried (very hard!) to hit the beats on Andrea's song when transitioning to another image for greater impact. If you are using video footage, you may want to tinker with the music and sound so that you don't lose the audio.
A more complete Windows Movie Maker tutorial is available here.

Looking for an excellent place to use your newly acquired movie-making skills? Check out the North of Beautiful Find Beauty Challenge! Justina is giving away an iTouch, and for every video uploaded, Justina will donate $10 to Global Surgical Outreach, an amazing group that helps kids with cleft lips and palates in the third world. See the details here!
Holly Cupala, author & rgz diva


5 comments:
Holly, This is so great! I'm going to try to practice all this--you have serious skills.
It looks awesome, Holly. Thank you.
I've been wanting to try this. Thanks for sharing the skills. I'm on a MAC, so it'll take some investigating. Fingers crossed it'll be i-easy. :o)
Post a Comment